Friday, December 28, 2012

Calligraphy Gifts


I love it when people want calligraphy gifts for Christmas! Here are a few Calligraphy gifts that came from my studio this year.

This one I call 'Weird Mat' both for the quote and layout as well as for the fact that though it is on mat board, the photo was to be mounted on it rather than behind a cut out. It was a fun project. (Please click on photos to see them a little larger.)


Like this idea? Pin it!


This Blessing of the Hands was a fun project with some added flourishing.


And here is a quote with illustration, to be matted and framed.


Like it? Pin it!

Friday, December 14, 2012

Merry Christmas


Merry Christmas in white script on red card with gold foil holly berries is my Christmas card for this year. Each one was hand lettered on a single piece of red card stock. The basic idea came from Michael Sull's workshop a few weeks ago. He demo-ed Spencerian script, which my capital letters qualify as, but not my lower case letters. They are too shaded to be true Spencerian.

The nib I love the most is a Spencerian number 1, an antique nib that is very flexible. The shades come easily to this little nib, so I have to concentrate to try to do letters without shading (the heavier strokes.) Michael Sull uses a Nikko G nib, which is much too stiff for me, but it also allows those unshaded downstrokes.

The fluid I used was Michael's favorite white - Dr. Martin's bleed proof white. I usually use McCaffrey's ivory when I want white on dark paper. I think I needed to be a little heavier with the white portion versus the water, but I do like the look of the card. I hope you do too, and I hope you have a very Merry Christmas!

The holly berries were done with a gold foiling pen. Fun to use, and discontinued in the USA, but recently brought back via Paper and Ink Arts in Nashville.

Friday, December 7, 2012

Place Cards - an Inexpensive Elegance

Place cards are an inexpensive elegance. They don't have to be reserved for weddings and large events. I have been lettering lots of pretty place cards lately including these recent ones for Christmas dinner parties. Aren't they pretty!

Other recent place cards for events other than weddings include these for a small dinner and a luncheon. It's fun to use place cards to add a touch of elegance to any day.


Saturday, December 1, 2012

Santa's Gift Tags

Santa asked me to help him with his gift tags this year. Here are a few I've done.


Ho ho ho! Christmas is coming fast!

Saturday, November 24, 2012

Computer Desk - in between

Due to babysitting, a happy family Thanksgiving and a myriad of other reasons, other than a few envelopes I have done no lettering or artwork of note this week. While looking for something to blog about, I ran across this photo (click on the image to make it larger) and felt very ashamed! This is the in-between stage of the computer area in my studio. I will not show the before and after. The before was a horror. I had a big old hand-me-down computer armoire that was a hulking piece of furniture. Rather than being a neat hideaway for daily messes, it had become a catch all and was a total mess - always. A few months ago I cleaned out my studio and, with a lot of help from my husband, got rid of the overlarge piece of furniture and placed my antique cherry desk in its place. I was so happy at the transformation! The after photo would have been of the mess it is today. The desktop and the bookcase beside it are littered in papers. Not so neat. Not so pretty. My promise is to get back to the in-between today!

Friday, November 16, 2012

Workshop with Michael Sull, Master Penman

For my birthday I attended master penman Michael Sull's Spencerian Script and Offhand Flourishing workshop sponsored by the Calligraphy Guild of Indiana. The chance to take this workshop doesn't come up everyday, so even though it meant being away from my family on my birthday, I reserved my place early.

Michael Sull is a master penman, and is well-deserving of the designation. Not only has he mastered the pointed pen, but he is also an excellent instructor. He could answer any question thrown his way, and he clearly explained every step. He made every step seem simple - just building blocks to get to the amazing finished piece, in this case fantastic name cards that he made for each participant. In addition, he has a very generous nature. He graciously gave me permission to use any photos or videos I took, saying he believes the information should be shared. In the spirit of sharing, I hope you will enjoy the following photos. I took videos as well. I hope I can learn how to upload a long video (about 12 minutes!) I took of him lettering my name, including bird, plume and color.

He added cunning little birds and color to many (some color was added after these photos were taken), plumes to most, and flourishes to all. A few of the cards included cartouches - small stand alone designs.

Here is a photo of Michael at his apparently infamous chalkboard, demonstrating gorgeous flourished capital Cs. Click on individual photos to see them slightly larger.


Happy November birthday to Tina Gianfagna also!


Friday, November 9, 2012

My colorful new dishes made me happy! The first time I used them was for a dinner with friends. They were so pretty I made place cards! It's nice to add a little beauty to everyday life.


For the place cards I used Pelikan 4001 Brilliant Red ink.
Dinner was good too, and the company was fun, as always.

----

Two other purchases with a lettering slant were this wooden sign in my windowsill


and this Celtic Birds Knot plaque from my favorite resale shop, reminiscent of the ones I saw when I was in Ireland several years ago.


I had a couple of successful days shopping. (I don't love shopping, and do it seldom, despite what my son and husband think!) The bad thing is that I only bought place settings for 6, thinking I could easily get two more later. I also failed to get cups. I went back to get those later (the day I settled for Cucina) and there were no pieces of the pattern left in any of the chain's Louisville stores. Sad me. Maybe they'll show up somewhere sometime.

Friday, November 2, 2012

Hand Made Calligraphy Pens

A FB friend had asked me about handmade calligraphy pens. Here are photos of a few, sometimes next to manufactured pens of similar types.

You can make a substitute for the popular "automatic" pens from England with tongue depressors, coffee stirrers, popsicle sticks and almost any other flat sided article with reasonable rigidity and a pencil or dowel rod and some masking tape. Tongue depressors/blades can often be cut with scissors to a flat edge. If scissors don't work, lay the piece on an old phone book and slice it with a heavy duty cutting blade such as a disposable blade carton knife. You may also bevel the edge with the knife by cutting it at a slant instead of straight across. Cut off and narrow the non-business end and tape it to a pencil or piece of dowel rod. You may like to use the entire length of the stirrer or tongue depressor, but I find them a bit uncomfortable to hold without trimming them and gluing them to the pencil or dowel.


The same raw materials can be used to make "Coit"-style pens, except in this instance you would notch the writing end.


If you have a product called "Stimudent" you can make an even cooler multi-line pen. I was unable to find any of the many I've made, and when I searched for Stimudents in the store I couldn't find any. I don't know if they are no longer being made or if my store just didn't carry them. They are a portable toothpick device in a matchbook-style folder. They come with two rows of attached picks and you can tear off one or more at a time. To make a multi-line pen tear off a grouping of three, four or five and tape the bottom end to a pencil. I'm sorry I have no photo to share.

I didn't make this cola pen, although I have made them before. This one is 'the bomb' to use a term kids used to use years ago (meaning 'great'.) What sets this one apart is it's 'stable flexibility' allowing smooth writing, and its fabulous spattering quality. I can get better marks with this pen than with any other ruling pen I have tried. You copy the shape (directions are available via Google searches, I'm sure) flip it over and copy it again. Fold it in the middle and attach it to a pencil with tape. This one has a neat little flap that folds over at its neck. Cola pens mimic ruling pens somewhat.


Below is a pen made from a hollow stick - possibly a thick reed of some kind. It's just been carved away at the end to form a thick 'nib'. The marks you'll get with this pen will be thick and clumsy compared to a manufactured nib, but sometimes you might like the clunky feel of the marks this one makes.


This one is one of my favorite types of pen. It is a very, very good pen that will do as nicely as any automatic pen (see above.) It is getting hard to find the report covers needed to make them, and again I couldn't find mine. Instead I have cut a report cover spine and placed it above a wooden paint brush to imitate the real thing. You cut the spine with scissors to any width you'd like. Hot glue the wider end of the spine to a dowel rod. Once its broken in you will love this pen! If you find any of this type of report cover, buy it! One spine will obviously yield many pens in almost any width you'd like. I probably wouldn't make these more than 3" wide unless I were using a very thick dowel as the pen staff.


One last 'homemade' pen is chopsticks. These wooden ones have a fairly sharp wedge, which will make a nice pen.


Besides these, you can use seashells, pine cones and lots of other natural 'tools'. Pick things up and play with them. See what kinds of marks they will make. If you find some wonderful new 'pen', share in the comments below, please!

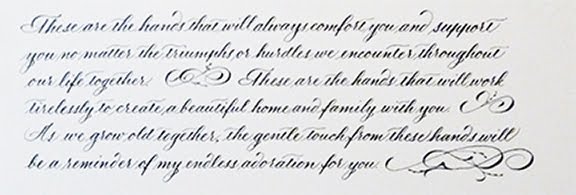
The wide pens - especially the report cover ones - are wonderful tools for making manipulated letters like these "Bone" letters:


Friday, October 26, 2012

I've been painting papers and making booklets. None are completely finished, but I'm happy with my playtime so far.


Here are some other painted papers, not yet made into books. The first image below shows how rough they start...ink marks on bare paper. Watercolor and sometimes gesso are added to get the painted pages. Sometimes I added salt and alcohol which add a textured look. It's similar to paste paper, but is much faster. You do not get the highly textured appearance of paste papers, though some gesso marks retain their actual texture, and the alcohol, salt and painting technique mimic texture fairly well.


For the book pages I used Arches text wove paper, which takes wet media very well, yet is thin enough to fold easily for books. For the covers I used 140 pound watercolor paper, painted in a similar fashion. I used a simple three hole binding stitch for the two small books that I bound this week. (Top photo.)